Today, we tackle what has become an invaluable item in our house: the reusable sandwich wrap. As I've written before, the idea behind these isn't new. Pioneers had to wrap their lunch in something. The beauty of the sandwich wrap is that not only do they cut down on the number of plastic baggies that you use, but they give you a nice, clean surface to eat on....a portable placemat! And they add some cuteness to the lunch box.
So here we go. The way I like to make my sandwich wraps.
You will need:
- Fabric of your choice for the outside
- Washable (or wipeable) moisture-resistant fabric of your choice for the inside [I use rip-stop nylon, but you can use laminated cotton, oilcloth, vinyl-coated fabrics, or PUL, just to name a few]
- rotary cutter (or scissors) and ruler
- velcro
- thread (I always use white...you'll see why later!)
First, cut your two fabrics into 12" by 12" squares using your rotary cutter or scissors.

Why a 12" x 12" square? Because my engineer (in a former life) brain likes nice, neat, even numbers. And 12" goes so nicely into a yard, don't you think? It just maximizes my yardage. And I have found that unless you make giant "Dagwood-style" sandwiches, this size sandwich wrap works just fine.
Next, we need to cut your velcro. You need a 2" piece of the "fuzzy" side and about a 3/4" piece of the "rough" side.

Now it's time to attach the velcro pieces. Your 2" piece is going to go on the right side (printed side) of your outside fabric. Using a ruler, center the velcro along the diagonal, about 1-1/2" from the corner. Pin.

The 3/4" piece of velcro will be attached to the right side of the inside fabric. Again, using your ruler, center the velcro along the diagonal about 1-1/2" from the corner. Pin.

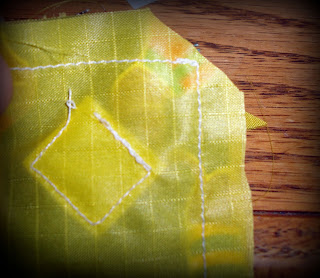
Now it's time to sew! Stitch around all four sides of the velcro. And this is why I use white thread....so it won't show on my white velcro.

Repeat for the inside fabric.

Place your two squares right sides together, making sure that the two velcro pieces are at opposite corners diagonally from each other.

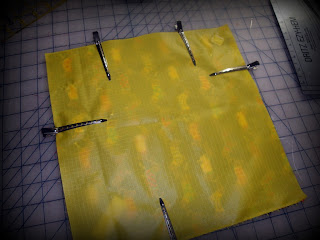
Now, you can pin it into place. But depending on what fabric you've chosen for the inside, you may not want to prick holes in it with pins (some plastic type fabrics are not self-healing and you don't want holes showing later). So I use some alligator-type hair clips to hold my squares together while I sew.

Stitch around all four sides, leaving a 2" (or so) opening in the middle of one of the sides.


Turn the squares right side out through the 2" opening, using a bodkin, pencil end, crochet hook, or some other object to get the corners. Then press your sqaure on the outside fabric (if your inner fabric has any plastic in it, it will melt!)


